User Management
The User Management page in NestMTX allows you to view, create, and manage users within the system. This page is crucial for maintaining control over who can access the NestMTX instance and what permissions they have.
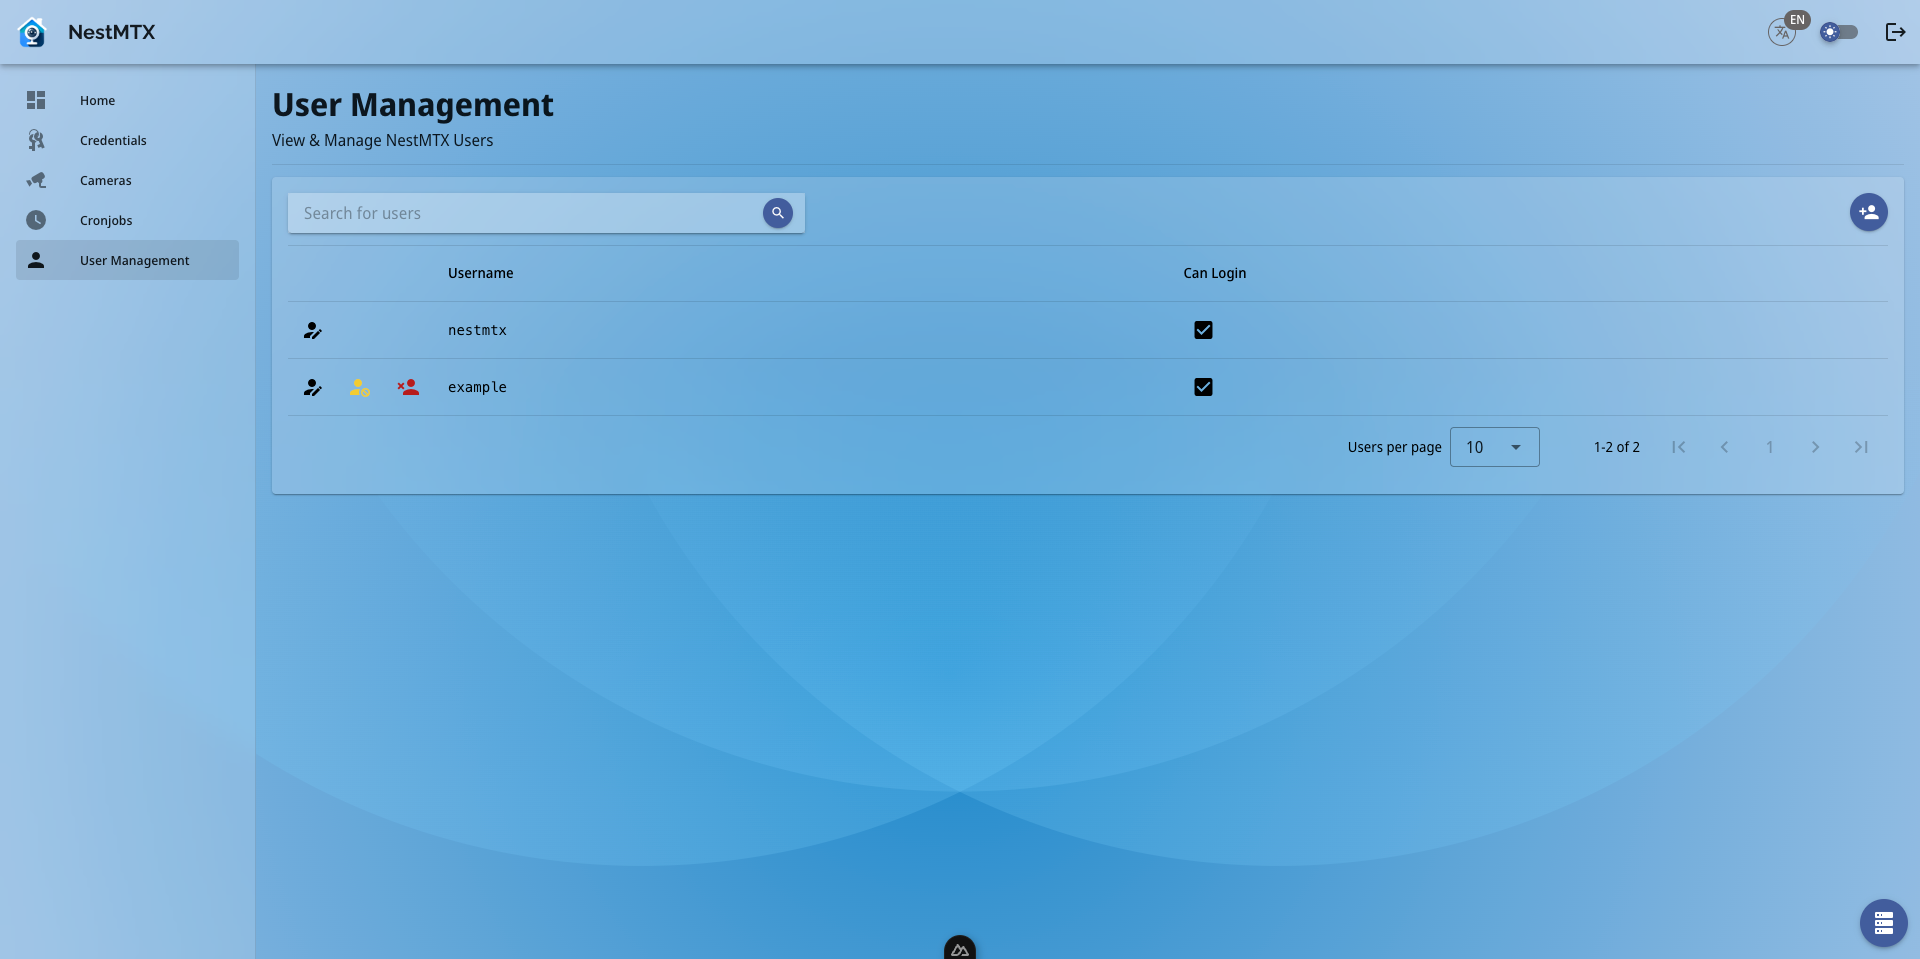
User List
The User List section displays all the users currently configured in your NestMTX instance. For each user, the following details are provided:
- Username: The identifier for the user within the system.
- Can Login: A checkbox that indicates whether the user is allowed to log in to the NestMTX interface.
Actions
Each user in the list has several action buttons available next to their username:
- Edit User: Clicking the pencil icon allows you to update the user's password or other details.
- Delete User: Clicking the trash can icon permanently removes the user from the system.
- Enable/Disable User: Clicking the yellow icon with the ban icon disabled the user from being able to authenticate. If a user is disabled, click on the green icon with the check mark will re-enable the user for authentication.
Note
You cannot enable, disable or delete your own user.
Creating a New User
To create a new user, click on the "Add User" button located in the top right corner of the screen. This will open the user creation form.
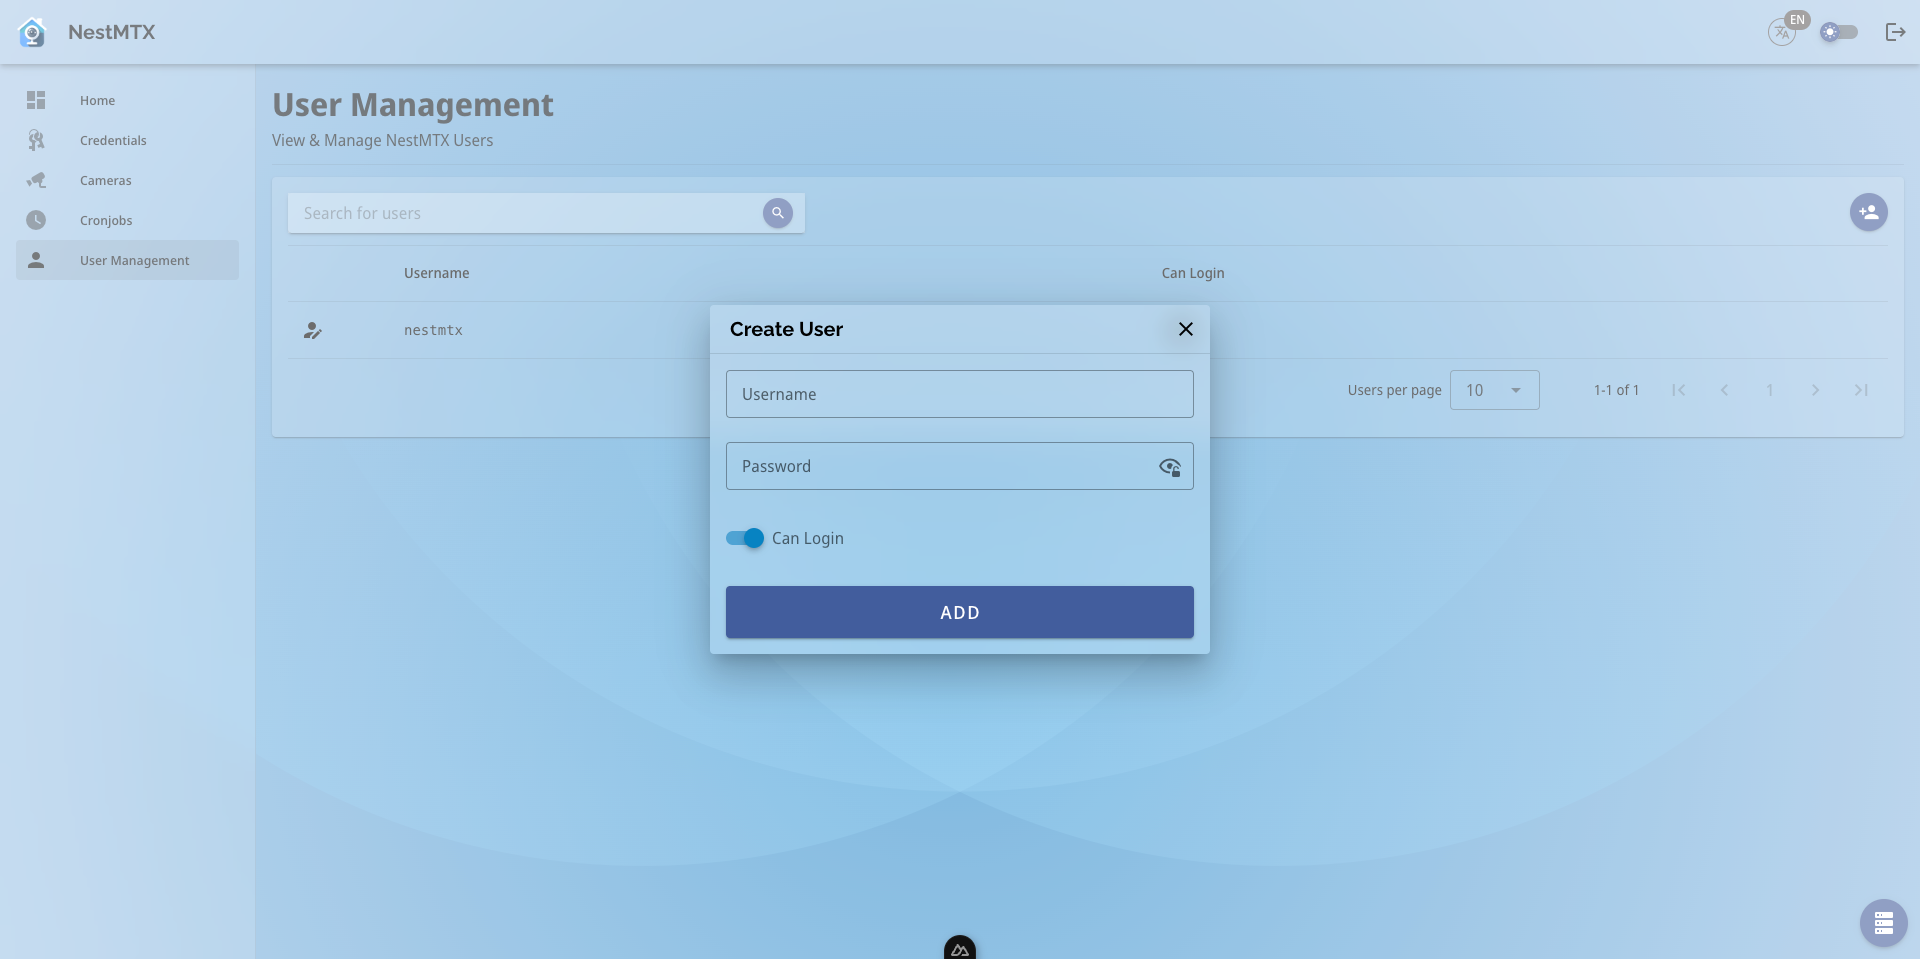
In the Create User form, you will need to provide the following details:
- Username: The unique identifier for the new user.
- Password: The password for the new user.
- Can Login: Toggle this switch to determine whether the new user will have login privileges.
Once all the information is entered, click the Add button to create the new user.
Updating User Details
To update the details of an existing user, click the pencil icon next to their username. This will open the Update User form.
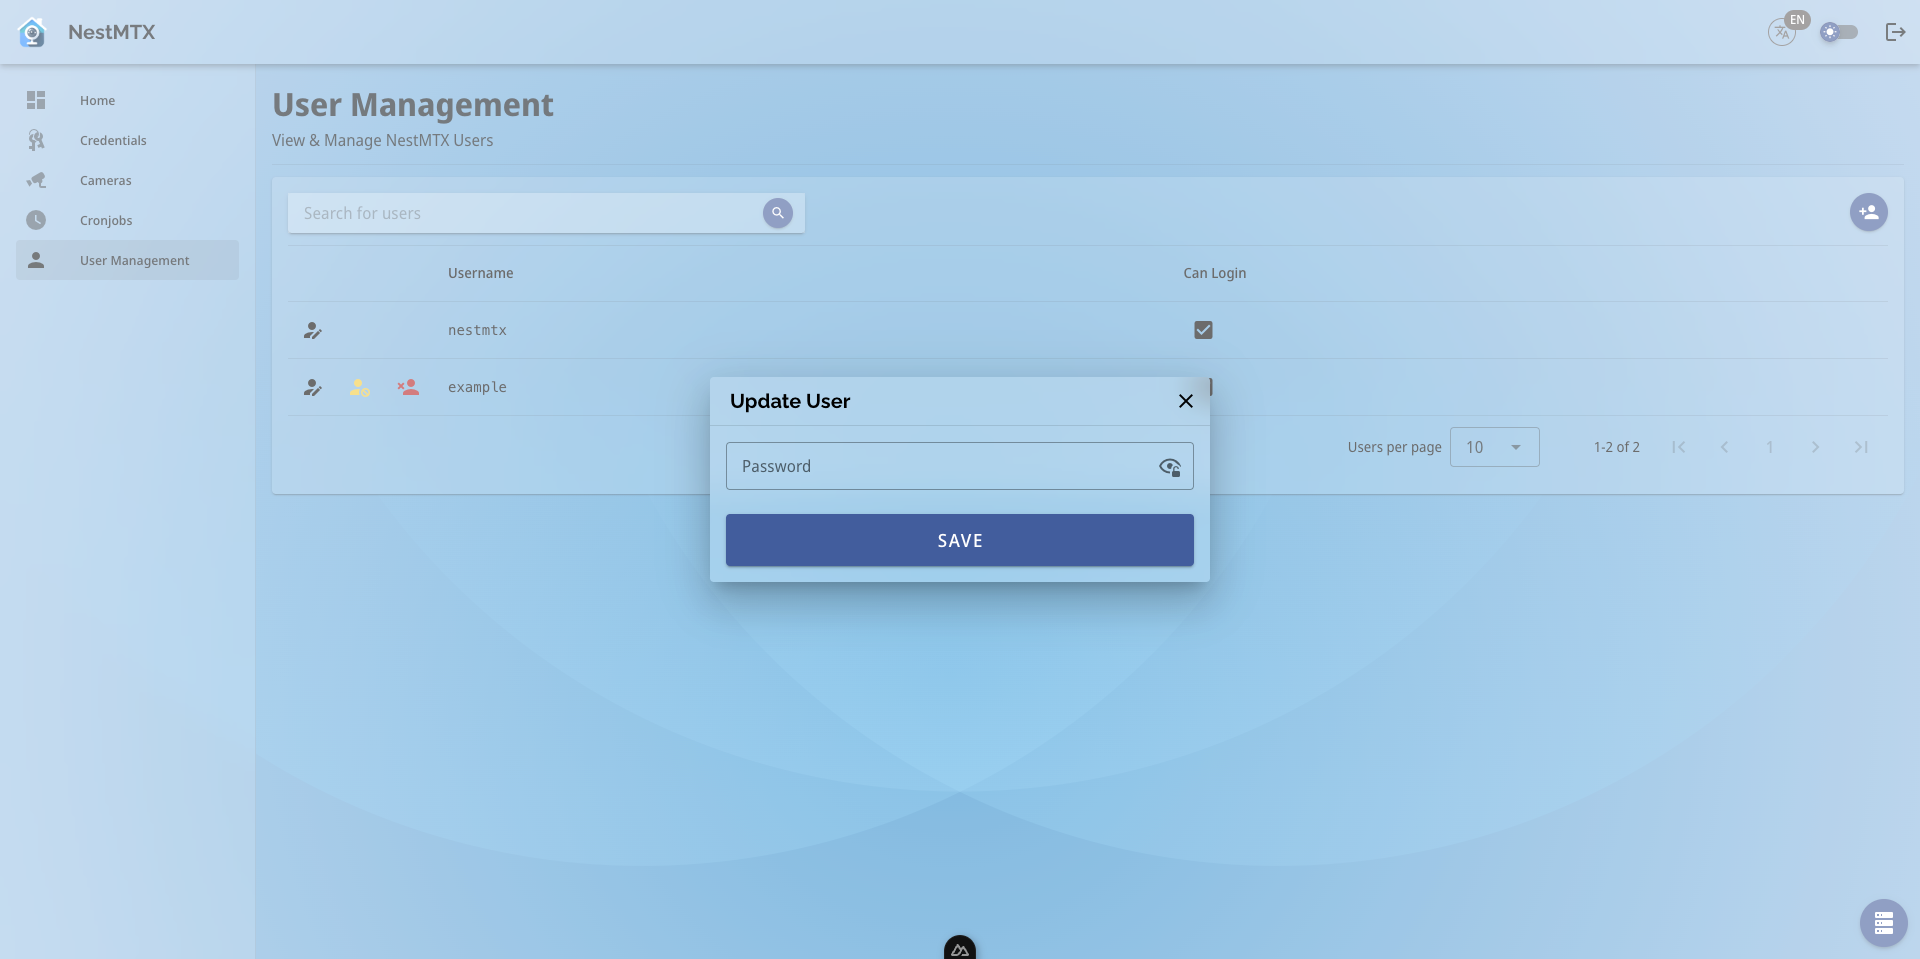
In the Update User form, you can change the user's password. Simply enter the new password and click Save to apply the changes.