Cameras
The Cameras screen is the main interface for viewing information and managing configuration options for your enabled Nest cameras.
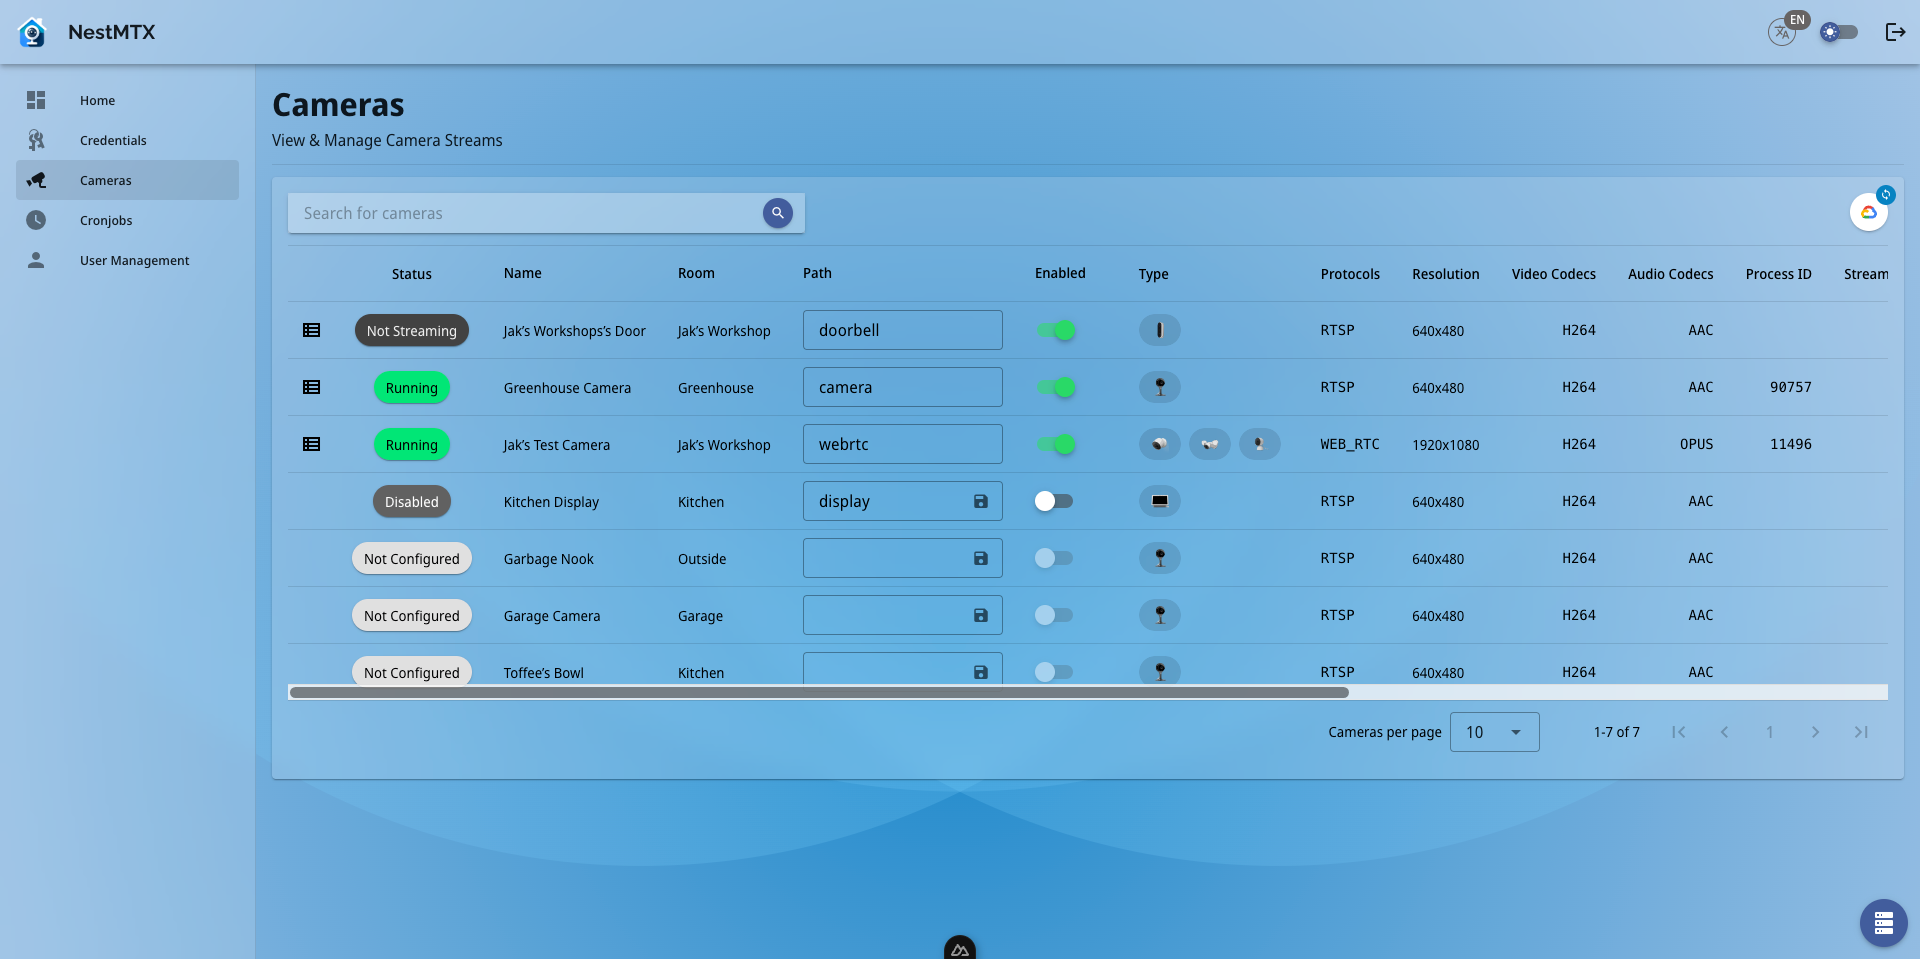
The Cameras list has the following columns:
| Column | Description |
|---|---|
| (actions) | Action Buttons for interfacing with the available cameras. |
| Status | The current status of the camera |
| Name | The name as identified in the Nest or Google Home Application. |
| Path | The MTX Path that the camera's stream will be made accessble on |
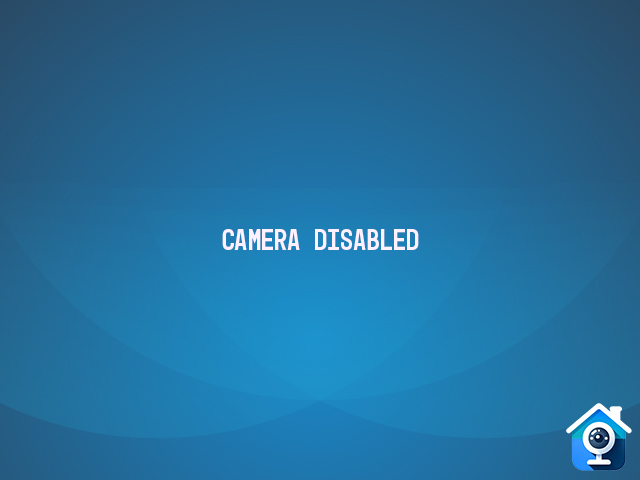
| Enabled | When set as disabled, any clients attempting to access the stream of the camera will see a "Camera Disabled" stream instead of the video stream from the camera |
| Persistent | When set as enabled, NestMTX will start streaming the camera automatically regardless of if there are any consumers of the feed. |
| Type | Icon(s) representing the inferred device type based on the device's traits. |
| Protocols | The protocols which NestMTX is able to access for the device. |
| Resolution | The reported resolution of the device, if available. |
| Video Codecs | The reported video codecs of the device, if available. |
| Audio Codecs | The reported audio codecs of the device, if available. |
| Process ID | The System Process ID of the ffmpeg or gstreamer process which is feeding the camera stream into NestMTX for restreaming. |
| Streaming | Yes or No indicating if the stream is currently active. |
| Up Time | The amount of time that the feed has been active and streaming for. |
| Track Count | The number of "tracks" contained in the stream. |
| Consumer Count | The number of clients which are reading the stream data from the. |
| Data Received | The volume of data received from Google's servers and input into NestMTX |
| Data Sent | The volume of data sent from NestMTX to clients |
Syncronizing the list of available cameras
In the action button area of the list (top right in LTR languages), there is a button which allows you to manually request a syncronization of available cameras from the configured Smart Device Management API's. By default, this happens automatically once per hour via Cronjob.
Enabling a Camera
In order to enable a camera for streaming you must:
- Set a unique path for the camera.
- Toggle the switch for the camera to the "On" position
Once this is complete, the "List URL's" action will be made available for the camera.
Disabling a Camera
You can disable a camera at any point by toggling the "Enabled" switch to the "Off" position.
Note
If there are any clients consuming the camera's feed, they will be disconnected.
Changing a Camera's Path
When the camera is disabled, you can change the path (or remove the path completely) by editing the value in the text field under the Path column.
Note
You cannot edit the path of a camera which is enabled. You must disable it first.
Accessing a Camera's URL's
Cameras which have been enabled will have the "List URL's" action made available for them. Once pressed, a dialog will open with all available URL's for the camera
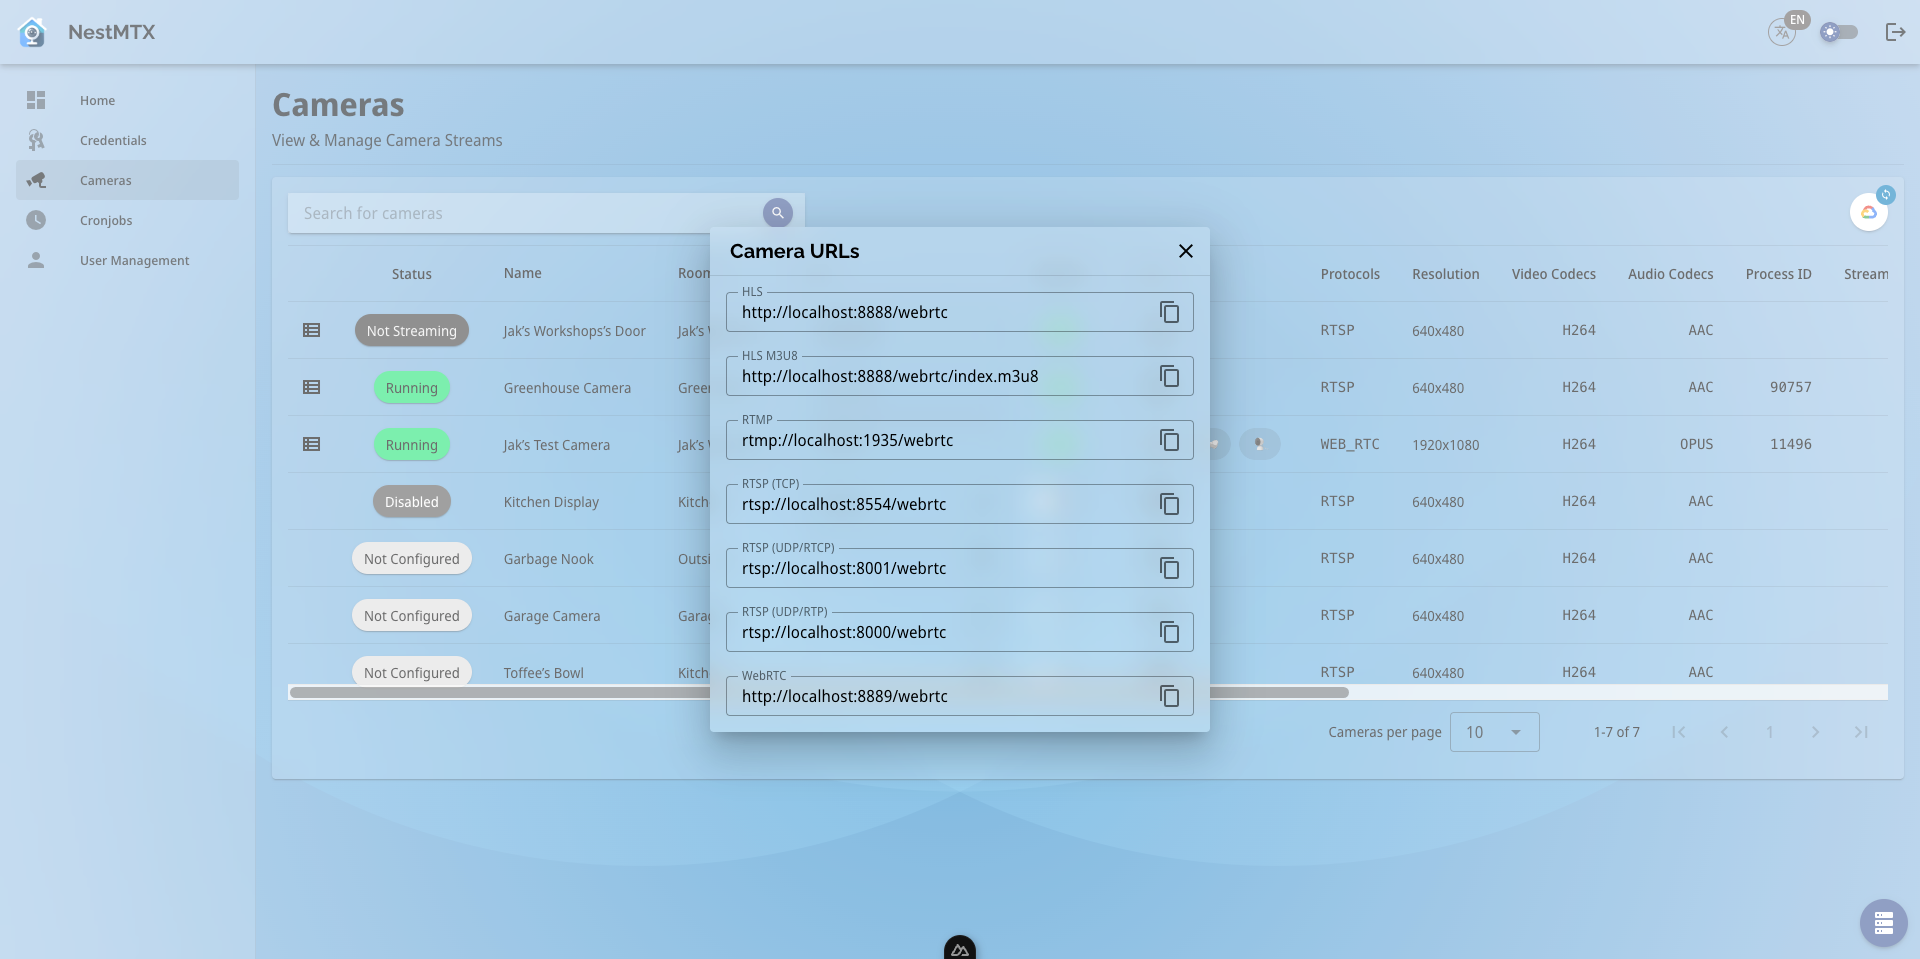
Tip
Only protocols which have been enabled via the Environmental Configuration will be shown in the URL list.
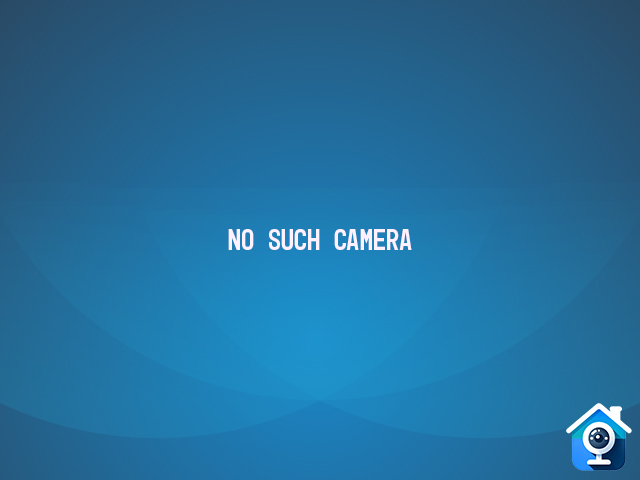
Note
If you attempt to access the feed for a disabled camera, a feed showing a message of "Camera Disabled" will show. If you attempt to access a feed for a path which does not exist, a feed showing a message of "No Such Camera" will show.
 |  |
For more information on how to use these URL's, see the integration guides.